

How to Embroider the Basket Weave/Woven Stitch - A Video Tutorial
- Melissa Galbraith
- Mar 14, 2021
- 2 min read

The basket weave or woven stitch looks like and is made just how it sounds, by weaving. Besides creating a great textural appearance, this stitch can also be customized based on how close or far apart you create your stitches. Here's how we'll use the basket weave/woven stitch for the Stained Glass Sampler pattern. Watch the video below to see this stitch in action and check out the step-by-step instructions for more information.
Want to stitch the Stained Glass Sampler? Find the pattern here or join Pattern Club and stitch along with us!
Video Tutorial:
Step-By-Step Instructions:

1. Start by bringing your needle up through the fabric, from the back to the front of the fabric.

2. Make a long, horizontal, straight stitch from one side of the design to the other. Bring your needle back down through the fabric.

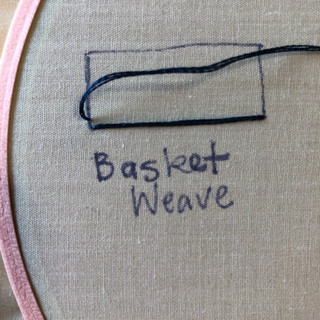

3. Repeat by making long straight stitches across the section you are filling. Leave at least a stitches width between each row as you continue making horizontal stitches across the space. The larger the space the wider apart your weave will be.

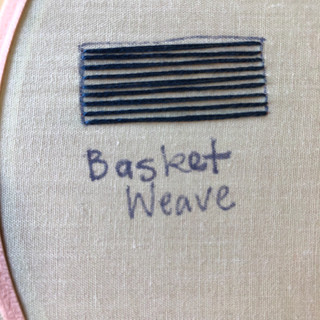
4. After all of the space is filled with horizontal lines, start weaving. Bring the needle up from the back to the front next to the bottom corner of the horizontal lines.

5. Using the eye of the needle, weave vertically with the needle (under, over, under, over) until reaching the opposite side of the horizontal lines.

6. Pull the thread completely through the stitching so that it’s taught, making a straight line, and bring the needle back down through the fabric.

7. Repeat going the opposite direction. Make sure to weave with the stitches as opposite from the previous row.
Comments