How to Create Hand Embroidered Fern Napkins
- Melissa Galbraith
- Dec 17, 2024
- 3 min read

Dressing up your dinner table is a way to make any meal an event. Wether it's a birthday, holiday, or just a Tuesday dinner that needs a little pizzaz, adding beautiful table accessories and decor can truly make the night special.
Embroidered fabric napkins are an easy and sustainable way to add a special touch to any place setting. Learn what materials you'll need for this DIY sewing project, how to sew your own fabric napkins with mitered edges, and then add fern embroidery by hand for a special touch.
How to Create Hand Embroidered Napkins

Materials and Supplies You'll Need to Sew Napkins
Linen fabric, I used Yorkshire 6.7 oz Natural 100% Linen in color natural from Fabric Wholesale Direct
Sewing thread in a color similar to the fabric
Sewing pins with glass heads
DMC cotton embroidery thread in varying shades of green
MCreativeJ Ferns stick and stitch pattens

How to Sew Your Napkins
1. Start by ironing your fabric. Use the linen/cotton setting on your iron.

2. Next cut out four 20x20 inch squares using the cutting mat, rotary cutter, and ruler. If you'd like more than 4 napkins, cut out as many squares as desired.
3. Now fold the ledge of the fabric over 1/4 inch and iron it to create a creased fold. Fold the edge of the fabric over again 1/4 inch and iron again. This creates a double hemmed edge and covered up the raw edge of the fabric. Repeat for all edges of the fabric squares.
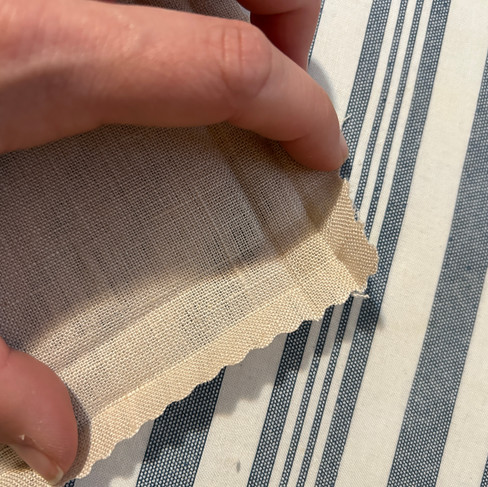
4. Next iron and fold the mitered corner. Start by unfolding the double hemmed sides. Then bring the point of the corner to the inner most folded crease. Fold the corner fabric over itself again. Then refold the sides to create the double hem. Pin the corner and edges into place.
5. Sew the edges of the napkins. When placing the fabric on the sewing machine, align the sewing needle to be just inside the inner fold of the hem. Stitch all the way around the napkin edge. At the corners, leave the sewing needle inserted into the fabric and flip the fabric to start the next side's line of sewing.
How to Embroider Your Napkins with Ferns
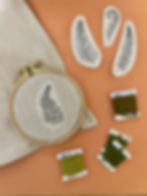
Once you've sewn your dinner napkins, you can add embroidery for additional embellishments. For this project I used my new Ferns Stick and Stitch patterns. These are water soluble stickers that make it easy to embroider anything!

1. Pick the patterns you'd like to use and lay them on the napkins. When you're happy with the layout, peel off the backing and press the patterns, sticky side down, onto the fabric.

2. Now place the napkin in the embroidery hoop. Gently unscrew the hoop so that the inner ring easily pops out. Lay the inner ring flat on the table. Place the napkin on top of the inner ring, centering the design. Then press the outer ring on top. Gently tighten the top screw and tug the fabric so that it is taught inside the hoop. You want to avoid any rippling or wrinkles in the fabric.

3. Start with the center stem line. Use the split back stitch.
4. Then add the leaves. The detached chain/lazy daisy stitch and leaf stitch are both great for filling in the leaf patterns.
Tips for stitching:
Keep your stitches short. This will help them not get caught on things when the napkins are in use.
Pay attention to the front and back of the fabric. The back of the napkins are exposed, which means any knots, tangles, or weird thread bits will show.
Avoid jumping around with the thread. Either work the thread along the back of other stitches or knot the thread off and start again.

5. After you're done stitching, remove the napkin from the embroidery hoop. Turn on the tap to warm/hot water. Place the stitched design under the tap and the pattern will dissolve. Lay the napkin flat to dry.
Napkin care:
Napkins can be washed in the washing machine and dryer. If you are worried about the stitching, hand-washing or using a delicates bag can protect your napkins.

***Thanks for reviewing my recommendations. This post contains affiliate links. Should you purchase an item listed, I may receive a small portion of the sale.***


