DIY Embroidery Tutorial: What Is Needle Lace and How Do You Make It?
- Melissa Galbraith
- Sep 24, 2024
- 4 min read

What is Needle Lace?
Needle lace or needlepoint lace is a term used to describe lace made with a needle and thread, instead of a bobbin or a machine.
Needle lace is created by stitching an outline foundation. This outline is used to support the needle lace. It is then filled with various detached stitches, usually the buttonhole stitch. The stitches are created in rows to fill in the shape and do not pierce the underlaying paper or fabric.
History of Needle Lace
Needlepoint lace dates back to 15th century embroidery work. The embroidery techniques of cutwork and drawn work were developed to add interest to white on white embroidery, and the methods used in these techniques led to the creation of needle lace.
Needle lace was later used in both Elizabethan and stumpwork embroidery. Historically, needlepoint lace was stitched in very fine white linen thread, whereas when used in Elizabethan or stumpwork pieces, needlelace was normally worked in gimp, metallic or silk thread.
How to Create Needle Lace

Materials Needed to Create Needle Lace
embroidery thread in multiple colors
card stock or thin cardboard
pen or pencil
How to Stitch Needle Lace
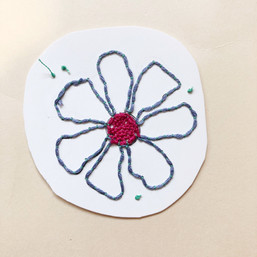
1. Draw your pattern onto a piece of card stock or thin cardboard. You can also trace your patten onto a piece of copy paper and then glue it onto the card stock/cardboard if following an intricate pattern or tracing a design.

2. Use your needle to punch holes into the card stock/cardboard along the outline of the shape. For my flower, I punched holes around the outline and the center of my flower. Each hole was about 1/8 inch apart. Be sure the holes aren't too close together otherwise they'll tear when the thread goes through them and the shape of the needle lace will be distorted.

3. Now use the couching stitch to lay down the outline of your shape. If your design has center points that overlap, like my flower design, start in the center most outline first and work your way out. Couch down 6 strands of thread using 1 strand of a contrasting color thread. It is important these two are very different to make it easier to see when removing later. Start the couching using a waste knot (knot on the front of the paper).
4. After couching around the outline, overlap the couched thread by a few stitches before trimming away the laid thread and knotting the tacking thread on the back of the paper.
5. Thread the needle with one strand of the color thread you want to fill in the flower center with. This thread sold be folded over itself so that there is a loop at the end. Start filling in the shape. Slide the needle underneath a section of couched thread, then through the loop at the end of the thread to hold it in place.
6. Now fill with detached buttonhole stitches across the shape. Do this by sliding the needle underneath a couched stitch and over the working thread. Move over to the next stitch and repeat working across the shape.
7. When you get to the other side of the shape, make a buttonhole stitch along the side of the shape to move to the next row.
8. Work back across the shape. This next now of detached buttonhole fill stitches will link into the loop of the previous detached buttonhole fill stitch row.
9. When you get to the last row of the shape, slide the needle underneath the back stitch and the loop of the buttonhole fill stitch before going over the working thread to secure the filling stitches to the shape.
10. To end the thread, run it underneath part of the couched thread outline, then trim away the extra.
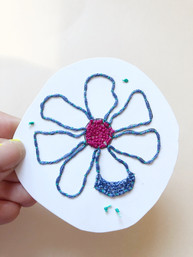
11. Repeat for the outer petals. Couch down 6 strands of the petal thread color with a single strand of contrasting thread. Then fill the petals with the detached buttonhole filling stitch. Start on the outside point of the petals and work towards the center.
12. After all of the shapes are filled in, use a corresponding color thread to cover the outline with the buttonhole stitch. Using 1 strand of thread with a loop start, outline the center of the flower, then the petals. These stitches should be close together to cover up the couched thread and lock the needle lace in place. End the thread by running it underneath some of the couched or buttonhole outline stitches.
13. Finally, trim the couched tacking stitched on the back of the card. Then gently pull the needle lace away from the card and remove any tacking threads still attached. I found tweezers very helpful for this part of the process.
More Needle Lace Resources

***Thank you for reviewing my recommendations and tutorial. This post contains affiliate links. Should you purchase an item listed, I may receive a small portion of the sale.***


Comments